

Sometimes, designers, artists and makers like to create freely and not follow a system.
If you're painting something for your bedroom wall then sure, go ahead. Don't stick to a process, just go with the flow!
But if you're running a business and working with clients, you need a process.
WITHOUT a clever design process in place:
Clients become confused because they don't know what's coming up next or what their designer needs from them.
The projects goes on much longer than the designer anticipated.
The client gets frustrated with the designer.
The designer becomes frustrated with his/her work and kiiiiinda wishes they were back at their day job.
The client never works with the designer again because the whole process was exhausting and unorganized.
WITH a clever design process in place:
Both parties know exactly when the project will start and finish.
The client enjoys the design process and is really excited about seeing the final designs.
The designer takes the lead in an organized and professional way.
The client isn't left feeling like they've wasted their hard-earned money on an amateur designer. Instead, they can't wait to tell all their friends to hire this designer!
 "Working with Nesha was a flawless and fun experience! She perfectly captured my vision with her designs, and she really cared about my business. She is one of the most professional and prompt people I have ever been blessed to work with. To top it all off, her painless questionnaire really helped clarify the branding of my business. I recommend you hire her now!" - Sarah Fox, The Bookish Fox
I recently finished up a brand and website design for Sarah Fox of The Bookish Fox, a writer and editor (and generally beautiful person!) and thought now would be the perfect opportunity to share a sneak peek into my design process.
Step one: client homework
Before I put pencil to paper, I like to get to know my client, their brand and their goals. It's important that I don't just create pretty graphics for my clients; I have to understand where they are now and where they want their brand to go so I can craft a design that can take them there.
I give my client's two assignments to complete before their project starts:
1. An in-depth questionnaire. In the questionnaire, clients can fill out their biggest goals for their business, their top three goals for their website, what they deem is most important about their website, which brands they love, which websites they love and much, much more.
2. A secret Pinterest board. I get my clients to fill a secret Pinterest board with visual inspiration for their brand so I understand the styles they like. I ask them to pin a minimum of 5 logos, 5 websites, 5 fonts and 5 colour palettes so I can see what elements keep cropping up.
With most clients, a pattern starts to form throughout their pins (i.e. they pin a lot of the same colour or the same font styles), so I can immediately see what they like and don't like.
Completed homework is SO important that I literally can't start the project without it. Fortunately, since most of my clients book their projects 2-4 months in advance, they almost always complete their homework before the start of their project. *Phew!*

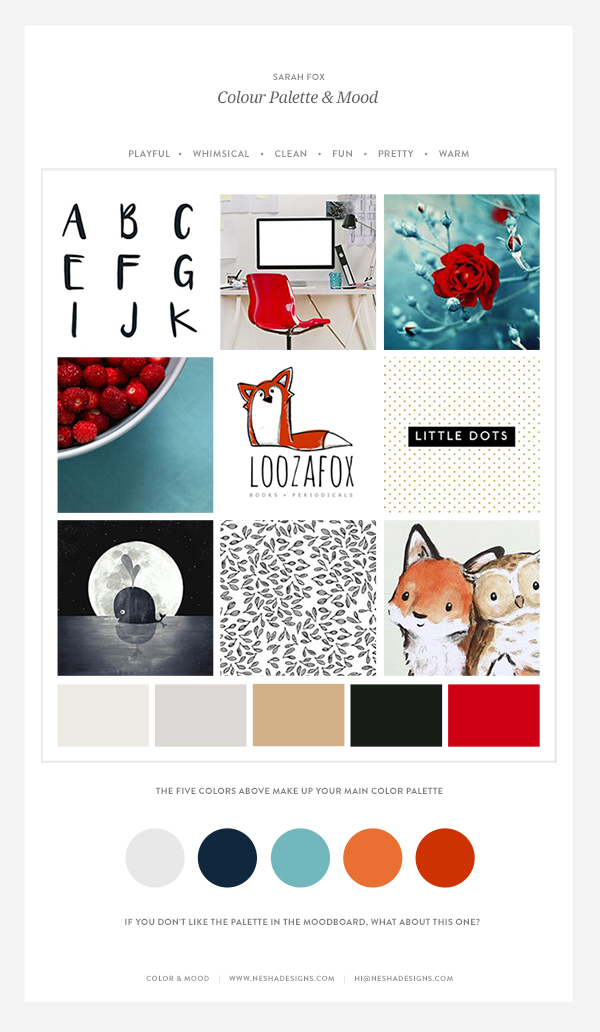
Step Two: moodboard & colour palette
Now, I create a moodboard from some of the images they pinned and I pull colours from those images to create their colour palette. I'll usually create two colour palette options (as you can see below), just in case they don't like the main option.
In Sarah's project, we started with the main palette but quickly switched to the other option because it's a warmer, more friendly fit for her brand.
[Related post: Free moodboard template + tutorial]
Step Three: main logo
Once we've nailed the colour palette and general mood of the brand, we move onto the main logo! This is where the real fun starts.
I like to present my clients with three logo concepts.
The reason I only present three logo concepts is because any more than three logos overwhelms my clients. I've tried more than three and less than three, but I realized that three logo concepts is the perfect amount. It doesn't overwhelm my clients, but is also doesn't leave them feeling like they don't have options.

When my client chooses the logo they want to proceed with, we then go through two revision rounds where my client tells me what they do and don't like about their logo, and I make changes and tweaks.
As you can see, the main change to Sarah's logo was the name which is now The Bookish Fox. Other than that (and some changes to the proportions of the logo), we didn't change much else.
It's important to realize that you don't have to use up your revision rounds if you like the logo just the way it is.
But, if you feel the opposite way and you need more revisions, it's no problem! I simply quote at my hourly rate for additional revisions, and I know a lot of other designers happily do the same.
[Related post: Why invest in a professional logo?]
Step Four: logo variations & sub marks
Now the colour palette and main logo is complete, I work on logo variations and sub marks.
A logo variation is another version of the main logo, with a slight difference. It could be a vertical version, include an illustration, or simply be in another colour.
Logo variations spice up your brand and add depth and additional professionalism. Who doesn't want that?!

A sub mark is another element that is pulled from the main logo. It's usually smaller and is often used as a favicon or profile picture.
Sub marks are especially helpful to brands with long business names because they provide a simple alternative to their logo. Sub marks also make greeeat watermarks because they're usually in a circular shape and fit nicely in the corners of photos.
[Related post: How to create a brand board]
Step Five: patterns & type combinations
Next step: fun patterns and professional fonts!
Just like logo variations and sub marks, a pattern (or two!) adds depth to your brand and adds to your brand's personality.
Reinforcing your brand vibes (as I like to call them) will help your leads fall in love with your brand.
Before working with me, a lot of my client's ask why they need things like patterns and sub marks etc.
Look at it this way:
Do you feel or look summery just by wearing a pair of sunglasses? No way! Your look is complete when you're also wearing your favourite sundress, some bright jewelry, super cute sandals and a beach bag.
The same thought applies to your brand.
People initially fall in love with a brand because of the way it looks and the way it makes them feel. If you want your leads to feel a certain way, you need more than a logo and a few nice colours to do it.
Step Six: social media branding & other brand elements
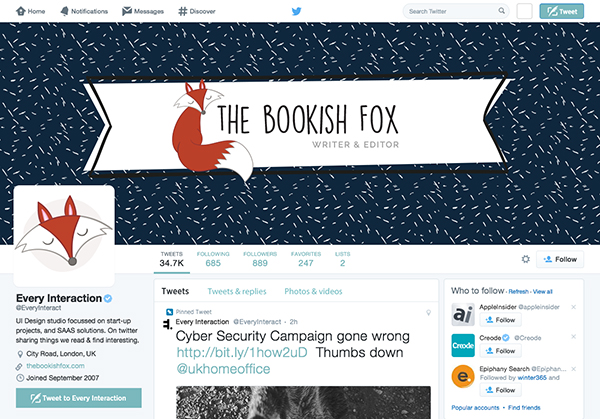
Your branding shouldn't be limited to your logo and website. Your branding should stretch across other areas, like your social media, business cards and stationery, inbox, client process and more.
That's why my design packages include more than just a logo, colour palette and fonts: they include social media branding, email signature design, newsletter design and blog post graphics.
[Related post: 7 signs telling you it's time to rebrand]
Step Seven: website mockups
Before designing a live Squarespace website, I like to mock up the homepage in Photoshop, save it, and show it to my client.
Showing my client a mockup of their website before designing live on Squarespace gives my client a chance to change their mind on the template we're using before lots of time has gone into creating the live site.
My client then lists the things they'd like me to change, and I make those modifications before moving onto the live site!
Step Eight: live website design


This is my favourite part of the whole process because I'm SUCH a Squarespace nerd! I could spend days messing around in Squarespace and not get bored.
I create the live website on Squarespace and test everything is okay. Then, I send my client the link so they can take a look! They then let me know if there are any changes they'd like to see before we wrap the project up.
Head this way to check out Sarah's gorgeous new Squarespace website!
Step Nine: handover & live training session
When my client has paid the final installment of their invoice, I hand over their brand files and website. BUT, the fun doesn't stop there.
I'd hate to ditch my clients when the 'designing' part of the project is over, because I feel that's the part where they need the most guidance.
No one wants to be handed a new gadget without an instruction manual, right?
I like to think the same thing applies to my projects.
That's why I provide my clients with access to a password-protected page on my website which is filled with Squarespace tutorials and brand guidelines, to help them maintain their brand and website when I'm not around.
[Related post: Squarespace vs Wordpress]
We also schedule a 30 minute Squarespace training session together where I walk them through Squarespace basics and answer any questions they may have.
I looooooove the Squarespace training sessions at the end of the projects because I get to make sure my client is walking away feeling 100% happy with the designs and the process they've been through.
Some may say it's a bit of a hassle to teach a live training call but I really do think it's worth it. Taking a little extra time and effort to make sure your client is equipped to use what you've created for them is imperative to the next stage in their journey.
I have had a few other designers ask what I do if my client keeps cancelling their training session or not showing up.
This used to be a struggle for me too, but here's how I handle it now:
My client has to schedule the call within a week of the project ending. This stops clients from scheduling a call three months after their project has ended.
If they have to cancel the appointment then that's no problem. Life happens! They can cancel the appointment and reschedule once, but they can't reschedule any more than that.
It's important that both the client and I respect each others time, and I think that setting these boundaries is a way for both of us to easily do that.
Designers- Does your design process need tidying up?
During my design process, my biggest aim is to make sure my clients are happy. I want them to feel like they made the right choice in hiring me, and a streamlined design process helps them feel that way. If you need help streamlining your brand and web design process, check out Organize & Automate! My course will walk you through refining your process and automating as much as possible.

*Disclaimer/truth: Any links in this article with an * next to them are affiliate links. I do get a commission if you purchase through my link, but I promise that I never link to products I don't use and love myself!

